Fort Collins recently grabbed No. 13 on the “The Top 100 Best Places to Live” ranking according to Livability.com, and “it’s easy to see why.” Among Colorado’s spectacular geologic landscapes that keep many occupied during the day, Fort Collins reveals an unappreciated side of natures beauty: a truly dark, night sky. Many hot-spots for visible stars are away from light pollution. Having the highest elevation of any state also allows for a steadier view through a lens. Fort Collins, is a photographer’s paradise.
Zach Schierl, Larimer County naturalist and astrophotographer led a night sky photography session on April 8 at Devils’ Backbone Open Space. Photographers of all levels and experience were given crucial tips for getting the best photos of the night sky. Schierl developed his love for photography while growing up in Northern Arizona. He went to College at Washington state earning his B.A. in geology and astronomy and an M.S. in geology. He decided to combine his love for photography and geology to capture the stunning beauty of nature.
To read more about Schierl and his work, follow this link.
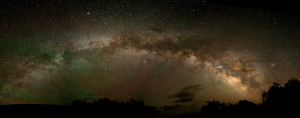
 The Milky Way stretches across the sky from horizon to horizon in this image captured between Delta and Grand Junction. This is a panorama of 12 images, each taken at a 30-second exposure. (Zach Schierl/Special to the Loveland Reporter-Herald)
What kind of gear do you need to bring for a night shoot?
Most individuals use a DSLR camera with a wide angle lens. Camera preferences vary with types of astrophotography. A sturdy tripod is absolutely necessary. If the camera is unsteady, the image will capture the stars as a blur or trail. An intervalometer is helpful when creating photographs of star trails. Some tape hand warmers to the barrel of the lens on colder nights in order to prevent fog due to moisture condensation. A hand warmer on the lens will keep the temperature high enough for the moisture to build up.
Having a red flashlight is also important to sustain night vision. There are two different types of cells in the eyes: rods and cones. The rods are responsible for dark-adapted, or scotopic vision while cones support daylight, photopic vision. Rods are most responsive to blue and green light, the same light that is projected from most flashlights and the LCD display on a camera. Night photographers use red light because his or her night vision is not affected. Thus, covering the blue lit screens with a sheet of red film is most helpful.
Location
The best night sky photos will be granted at least 50 miles from a big city for clean skies. Light pollution will greatly make or break the quality to your photograph. Darksitefinder.com is a useful tool that measures population densities to estimate the amount of light pollution levels. This program is also convenient when researching for regions void o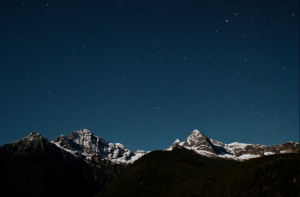 f the glare of the city. The brightness of the moon should also be factored into location. Astrophotographers prefer to venture out into a moonless(a new moon) or half-moon phase night for the most clarity of the stars.
Depending on individual preferences, a nice foreground should include a keyed landscape feature such as a mountain on the horizon, or a body of water to provide reflections. A human element can also add to the ascetic.
It is important to be aware of the tracking of the stars and the angle at which the moon rises or sets. Many use Stellarium, a program that stimulates the star field, moon phase, and brightness of location at a certain time. Knowing different constellations and the specific timesduring the year in which they are most vibrant will also enhance the resulting
images.
(Washington– North Cascades by moonlight taken by Zach Schierl)
How about the weather?
Astrophotopraphers usually spend long hours capturing the night sky. There is a big commitment to these efforts making the planning of every detail, even down to the weather, important. Learn how to interpret the cloudy description on weather websites. Descriptions of partly cloudy skies are usually not the worst conditions. If skies are mostly cloudy, the stars will usually be covered.
Camera Settings
The go-to settings are 30-seconds at F/2.8 or the lowest aperture your lens offers. The ISO should be set to 3200 or higher for static
shots of stars. Shooting raw images will give the photographer full control during post processing. JPEG files on the other hand, will compress the photograph making it more convenient for those not familiar with editing programs
The white balance is best when set to tungsten or fluorescent. Auto balance will likely give an unattractive orange night sky. It is also important to be aware of the changing white balance with time lapses, as the night progresses.
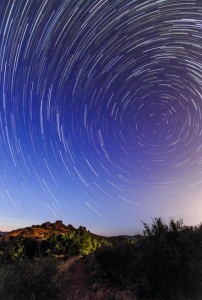
Zach Schierl captured these star trails over the Devil’s Backbone Open Space last month by creating a composite of 30-second exposures taken consecutively over one hour. (Zach Schierl/Special to the Loveland Reporter-Herald)
How much post-processing goes into the images?
Post processing will enhance the image quality and reveal stars that were not apparent with the naked eye. Adobe Lightroom is useful for noise reduction and bringing out details with shadow and highlight sliders. Other programs such as Adobe Photoshop are helpful as well. Images will dark on the camera. Amplifying desirable elements from the picture will conclude the finished product.
